Our customers save on average £549 with our free removal service. View T&Cs
Posted on Tuesday, 16th June 2026 | Posted in how to move a shed , how to transport a shed , how to move a storage shed , how do you move a shed , how to move a shed without dismantling , how to move a shed by hand
If you’re moving house or reorganising your garden, we’ve got the tips you need to get your shed to its new home safe and sound. Try our guide to transport your shed – and you might not even need to dismantle it first.
Your garden shed is a great way to store extra plant pots, outdoor furniture and more – but if you’re planning a garden makeover or moving house, it can be a tricky piece of kit to transport.
There are two ways to move your shed; you can dismantle it and transport each piece separately or move it in one go. Whichever way works best for you, we’ve put together a step-by-step guide to help you move your shed safely and smoothly, without any damage to your belongings.
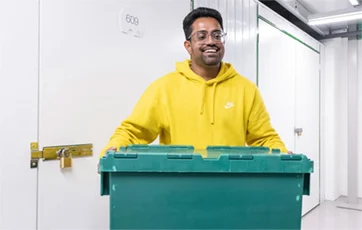
If you’re looking for short-term storage to keep the contents of your shed safe while you move, we can help. Find your nearest Space Station store.
First things first: get together the tools you need to get the job done. You’ll most likely need:
· A shovel
· A screw gun and hammer
· PVC or metal pipes
· A car jack
· Pickup truck or trailer (if you’re planning to transport your shed to a new house by yourself. If you’re moving into your local Space Station storage unit, we offer free removals within 10 miles)
Tip: You’ll need metal or PVC pipes that are at least 10cm in diameter to ensure they're sturdy enough to support your shed's weight.
Remove the contents of your shed and stack everything neatly, ready for transportation or storage. It's also a good idea to give your shed’s interiors a good clean, so everything feels spick and span once it’s set up again.
Use your installation manual to carefully dismantle each section of your shed. Keep screws and nails safe so you can easily put your shed together once it’s in its new home.
If you’re moving your shed within your garden, carefully carry your materials piece by piece to their new home. Make sure to only carry one section at a time and enlist a friend to avoid straining your back as you lift. If each individual piece feels too heavy, your PVC or metal pipes will come in handy – we'll explain why in the next section in this guide.
Before you get re-installing, spend some time prepping the area to make sure your shed sits level. Rake the area, removing any stones or rocks that could cause damage, and mow the lawn around the area to make the rebuild easier.
Don’t underestimate how much extra weight the contents of your shed add – even if you’re not dismantling it, it’s still a good idea to take everything out before you transport it.
Securing fragile parts of your structure makes it safer to move. Take the windowpanes out of the window openings, especially if they’re made of glass, and lock the door to make sure it doesn’t fly open or get damaged in transit.
If you're moving your shed in one piece, dig a hole underneath it, making enough space to position your car jack under the base. You should also dig small six-inch holes at regular intervals around the shed to loosen it from its current position.
Place your car jack underneath the shed base at one end and lever it up carefully, with some friends on-hand to hold it secure as you lift it from the ground.
This is where your metal or PVC pipes come in. Once you’ve elevated your shed using the car jack, place your pipes along the ground, spreading them evenly and making sure they’re at a 90-degree angle to the base.
Carefully push your shed along the pipes or rollers with help from others until you reach your shed’s new location, or the truck you’re transporting it in. Once you reach the truck, use your car jack to load it up and secure it in position with ropes or straps.
Sheds can be very heavy, so work as a team, making sure that everyone’s safe and comfortable throughout the process. For larger structures, it may be worth getting help from professionals with specialist tools and equipment.
Once your shed’s in place, you can start organising your garden around it – and if you want to make the most of your outside space this year, browse our small garden ideas for inspiration.
The weight of a shed varies depending on its size, dimensions, and the materials it’s made from. Generally speaking though, an average garden wooden shed weighs around 225kg.
Yes, you can. Make sure you’re prepared with the right tools before you get started – but if you’re unsure, it’s always best to get an expert in.
Ideally, you should try and avoid cold, wet weather when you’re moving your shed. There's less risk of damage to your shed when the ground is dry – and it’ll be much more pleasant for you to get the job done in the sunshine than pouring rain.